|
|
|
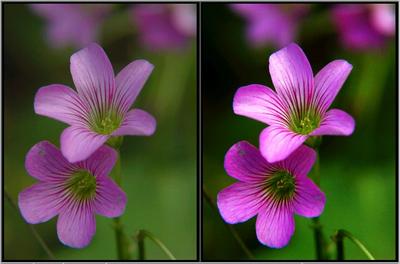
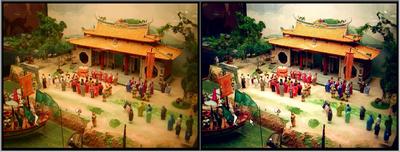
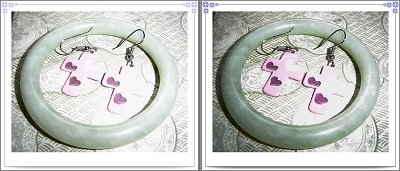
Slide Film Effect
|
|
Simulating the color of the slide film is one of the important
functions of nEO iMAGING. Color responses are altered in the
program to achieve higher contrast and bright eye-catching
feeling. The algorithm has been optimized for several times in
order to preserve the subtle texture in dark area yet assure no
blow out at high key field. The Red is reproduced accurately.
Transition between colors is smooth with no artifact looking.
Several options are provided to users. Among them Portrait mode
is optimized based on color tone of East Asian whose yellowish
skin tone need to be well controlled. |
|
 |
|
 |
|
 |
 |
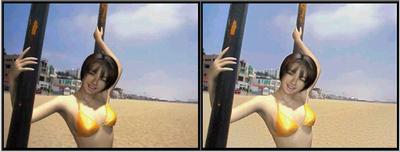
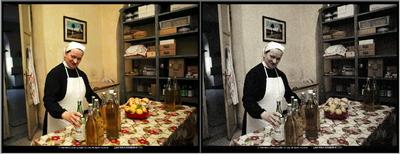
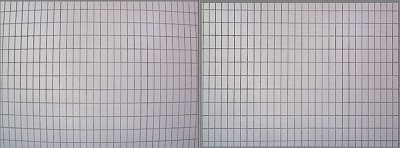
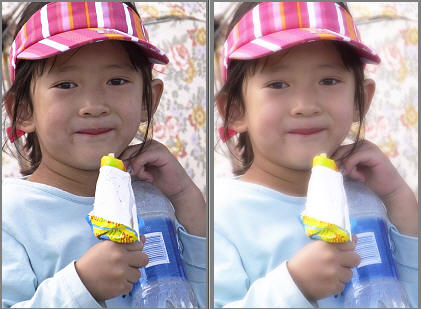
AE (Auto Exposure)
|
|
When shooting at back light condition, camera may expose based on the strong background light which result a severely under-exposed the subject face. Digital Exposure Compensation can help bring the under exposed face back to light while without touching the properly exposed area. Effort was taken to optimization the transition between dark and bright to achieve a natural look. In addition, the smart algorithm assures no glow appear at bright area. Enhanced compensation can increase the magnitude of the correction in large scale. |
|
|
|
 |
|
|
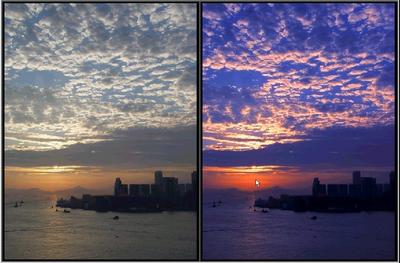
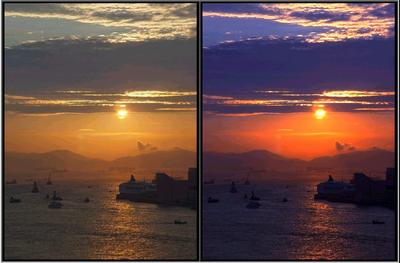
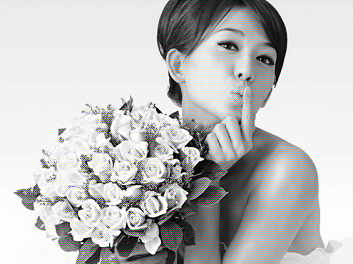
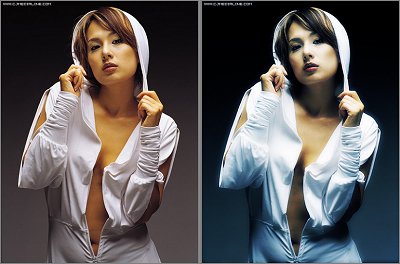
Sunset Render
|
|
In addition to
render sunset, this function also can be used on portrait and other landscape photo. It warms up the bright area and blue-lize the dark field to make the color vivid. Subtle texture at dark field was preserved. This function also allows users to adjust color balance, texture preserve and saturation control. User can experiment whatever they want for different moods. |
|
|
|
 |
|
|
Old
Photo
|
|
A
special effect with little color but profound contrast and
grainy. You can keep your photos in your shoebox for 30 years to
get same look but this function only needs 1 sec. |
|

|
|
 |
|
|
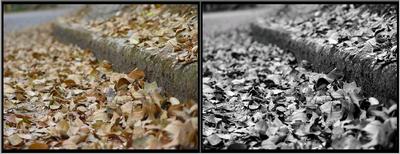
Black and White Effect
|
|
There
are 2 parameters Balance and Contrast can be adjusted. Both can
affect the look of grey scale. When contrast set to -20 the
result look like B&W processed negatives. |
|
 |
|
|
|
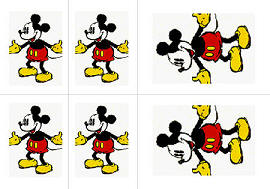
Cross Processing
Effect |
|
Back
to film age, the final result from cross processed negatives can
be dramatically different which all depends on how the
photographers are able/unable to control their experiments and
their personal tastes. Crossed process negatives created some
interesting looks featured unusual high contrast between warm
and cold color, saturated high key and severe shifted low key
color. If user wants to adjust the parameters, it’s recommended
that followed by a auto exposure adjust in order to increase the
contrast. |
|

|
|
 |
|
|
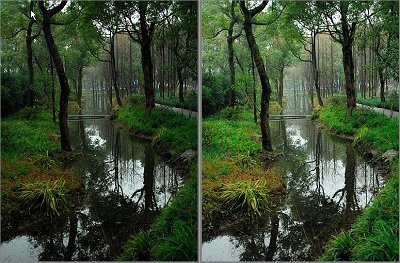
High Dynamic Negative Effect
|
|
This
special function separates detail calculation in high key and
low key area and lead to a high dynamic range photo. Very low
loss is achieved for fine details. It’s my intention to achieve
a result looks like photo on high dynamic range negative. This
function has been optimized for several times in order to
preserve original color. The contrast and color response are
simulated to resemble negative film. The final result is very
close to combination of bracket exposed photos. |
|
|
|
|
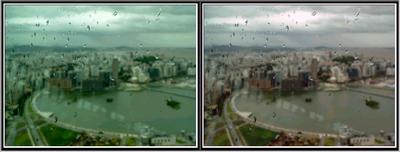
Night
Noise Reduction
|
|
I developed
this function in order to get rid of the glow or noise at night
scene but preserve the fine details of the lights, building
structure and over all sharpness. Different from main stream
algorithm, my way doesn’t use any blur so the sharpness is well
preserved. |
|

|
|
 |
|
|
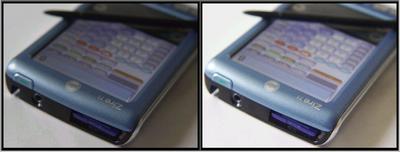
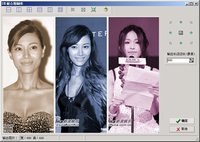
White Balance One Touch Fix
|
Each
digital camera manufacturer has tried their best for in-camera
white balance correction. But under certain complicated lighting
circumstances, the auto balance still can be fooled and result a
photo with heavy color cast. “White Balance One Touch Fix” can save the photo by implementing a white balance correction at post processing.
When using “White Balance One Touch Fix”, we simply point to a neutral (meaning non-colored) subject in the
image and let the program do the rest. Things like neutral subjects includes: white teeth, white wall, uncolored floor, uncolored paper e.t.c..
The review is real time so you can try several objects until you think you get the good result. |
|

|
|
 |
|
|
You
can also adjust the R,G,B channel for further correction if
needed.
Your visual involvement is important for the white balance
correction. However at complicated lighting condition,
especially when there is complicated color transition area
between warm and cold, it's hard to eye ball the right color
balance. You only need to make sure the main subject is
correctly white-balanced.
Please be reminded that to correctly set
the in-camera white is still very important because if the camera is set too
wrong you will need large scale white balance adjustment which
causes color cover flow and make the picture look pretty
bad. |
|
|
|
 |
|
|
|
CCD Bad Pixel Repair |
|
CCD
bad pixels will leave bad spots at exactly same location
of all your photos. Don't it bother your? Those bad spots
can be removed by the bad pixel repair function. It interpolates
the value based on the value of pixels surrounding the bad
spots. To get out the full potential of this function, an
all-black sample photo from the same camera should be provided
to the software to allow it accurately detect the position of
the bad pixels. |
|
|
|
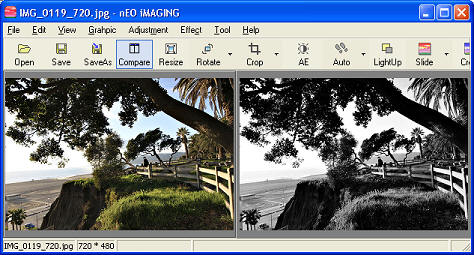
Compare Mode
and Normal Mode |
|
The
compare mode allow the users to compare before and after in a
convenient way. At normal mode, one can zoom in or out freely.
The maximum magnification is 1000%. Mouse roller is also
supported. During the picture process, you can call up a
function manual by right clicking the mouse. |
|
 |
|
|
|
Level and
Curve |
|
Level and
Curve are probably two most frequently used function in Adobe
Photoshop. This software provide similar functions.
|
|
|
|
|
|
Skin Yellow
Reduction |
|
This
function effetely reduce the yellowish look of the skin tone. |
|
|
|
Water Mark |
|
You
can use this function to protect your photo or make them unique
in your way. Not only text can be used, you also can use picture
as the watermark. For example you can make a icon for your
signature or personal stamp. To put it onto your photo you only
need a click.
The water mark support transparent or semi-transparent file
format like PSD, PNG and GIF. With the batch process function,
you can stamp all your photo at one shot.
Don't know how to make the
transparent icon? No problem, you can find thousands pre-made stamps
on internet. Just choose a few! |
|

|
|
|
|
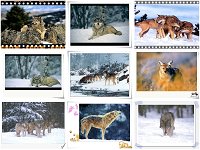
Frame |
You can store your collection at My Favorite otherwise the
amount of available frames maybe too overwhelming.
There are more frames you can find in the forum. |
|
 |
 |
|
|
|
Mask Frame |
|
Add some mood to your
photos? Another useful tool is the Mask Frame.
You can designed your own
masks. Copy your own masks to the MASK folder to let the
program see it.
|

|
 |
|
|
|
Highlight
Reduction |
|
Sometimes flash is used when the camera is tool close to the
subject, which leaves an
over exposed area which fades out the original color. It's
recommended to apply Exposure Reduction for those over-exposed
photo to recover most detail and color. Similar to Exposure
Compensation, there are 2 parameters to adjust.
|
|
 |
|
|
|
Anti
Distortion |
|
Usually there are 2 types of
lens distortion accompanying most zoom lens - barrel
distortion at wide side and pincushion at tele side. These
distortions can be fixed by lens distortion Correction easily.
|
|
 |
|
|
|
ID Photo
Layout |
|
You can arrange small ID
photo at standard 3x5 or 4x6 paper.
|
|
 |
|
|
|
|
|
Combined
Photo |
|
This function is very useful
for internet publish, such as internet seller who need put
multiple photos into one. It's easy and flexible. There are
some templates to start with, like 2x2、3x3. While open
multiple photos, it's still possible to hide opened photo. To
add more convenience, you don't even need pre-apply special
effects to the photos, just right click the right mouse button
and that will load up some special effects for you to choose
from.
|
 |
 |
|
|
|
Noise
Reduction |
|
Soft focus lens mostly is
used on portrait shooting to create a romantic feeling. This
function is developed on common theory used in Photoshop but
with more optimization - the algorithm is designed separately
for bright and dark part - so it's rather smart function.
You also can apply it on
some landscape or other subjects if you like.
|
|
 |
|
|
|
Soft Focus
Lens |
|
Soft focus lens mostly is
used on portrait shooting to create a romantic feeling. This
function is developed on common theory used in Photoshop but
with more optimization - the algorithm is designed separately
for bright and dark part - so it's rather smart function.
You also can apply it on
some landscape or other subjects if you like.
|
|
 |
|
|
|
Bracket
Exposure 3 in 1 |
|
As you may know the raw file
contains higher dynamic range than in-camera process JPEG. If
you desire more dynamic range in JPEG file, you can do it at
post processing stage. 3 different exposed photos (under
exposed, normal, over exposed) can generated from one Raw file
by adjusting the exposure in your raw converter. Then this
program can help you create a high dynamic photo by combining
the 3 photos together. It results a photo with details in both
dark and bright field.
|
|
 |
|
|
|
Extreme
White Balance Fix |
|
This is a unique function
from nEO iMAGING. It's designed to correct severe white
balance shift due to things like wrong white balance
setting. Severe white balance problem can cause color over
flow usually is difficult to correct. This program can
estimate the magnitude of color shift and apply correction
automatically. It's also can pull back a little lost detail.
The whole correction doesn't need user involve and no
parameters to set.
For photos with severe white balance shift, it's recommended
to use this function prior to White Balance One Key fix.
|
|
 |
|
|
|
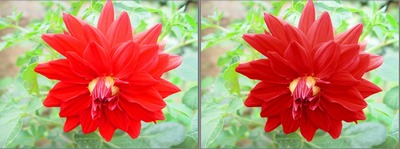
Flower Red
Reducer |
|
Digital
cameras tend to over saturate the Red color which make the
texture in the red appear to be lost. The Red De-saturation
can pull back the red overflow and repair the texture
effectively. Thanks YiGe for providing the algorithm.
|
|
 |
|
|
|
Beautician |
|
Skin polish + soft focus lens. It automatically recognize
skin tone and smooth out the obvious pores. The polishing
algorithm keeps the fine detail like eyes or hairs as much
as possible so it minimized the impact to sharpness.
Note: If there are
some obvious blemish or other imperfection on skin, another
function "Stain Remover" is suggested to be used before you
apply Facial Treatment function.
|
|
 |
|
|
|
IE Magic
Photo
|
|
It's a
interesting tool. The photo appear to be black & white in
your IE browser, when you select the photo with Ctrl+A, the
photo becomes colored! A magic effect! |
|
 <<<Try me with CTRL+A ~
 |
|
|
|
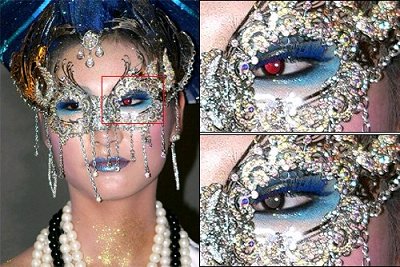
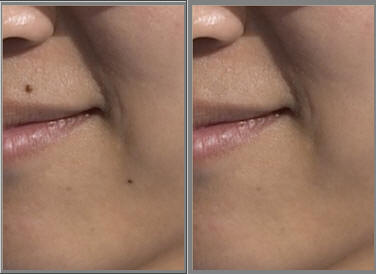
Red Eye /
Stain Removal
|
|
Just
click on the red eyes. Software can scale the scope of red
eyes automatically.
|
|
 |
|
To remove the blemish or imperfection, it's as easy as Red Eye
removal.
|
|
 |
|
|
|
Studio
Style |
|
If you
look at some photo from studios, you may notice regardless
the real skin tone and smoothness of the subjects, the
pictures all show super smooth skin with very dreamy mood.
It probably doesn’t matter if you
like it or not, a lot of girls like it! By using this
function, you can achieve same result in a brief second.
|
|
 |
|
|
|
|


